Our Pick: Honey Lake
Check price →How to Start Beekeeping: The Complete First-Year Plan
Everything between "I think I want bees" and a colony alive next spring: the class to take, the rules to check, the hive to buy, where bees actually come from, what it costs, and the monthly work nobody mentions at the farmers market. Written the way we wish someone had written it for us, with the varroa talk up front instead of buried.
By The BeehiveKits Hive Desk · 24 min read · 2026-08-28

Honey Lake 10-Frame Beehive Starter Kit
Honey Lake
The complete, beeswax-coated 10-frame starter that a beginner can actually assemble and run.
Check price★ Our Top Pick
Best Starter Hive Kit
Honey Lake 10-Frame Beehive Starter Kit
The complete, beeswax-coated 10-frame starter that a beginner can actually assemble and run.
Not sure yet? Compare all 4 picks below ↓
Starting beekeeping is a winter decision that becomes a spring project. If you want bees flying in your yard next May, the work starts now: a beginner class this fall or winter, bees ordered between December and February, equipment assembled and painted before the package or nuc arrives in April or May. Miss the ordering window and you wait a year, because good bees sell out the way good concert tickets do. For most beginners the buy list is short and knowable: a solid starter hive like the Honey Lake 10-frame kit ($115.99), a ventilated suit, a smoker, a hive tool, and the bees themselves at roughly $150 to $250 per nucleus colony as a market range.
This guide is the whole map. We cover the education step almost everyone skips and regrets skipping, the local ordinance and registration homework, choosing a hive type without falling for internet holy wars, the two-hive rule, nucs versus packages, siting, install day, feeding, inspection cadence, varroa monitoring, and the first winter. Where a decision deserves its own deep dive we link the full guide, and where money is the question we send you to our itemized cost index rather than hand-waving.
Our lens on every piece of gear is the same one we use in our reviews: would we put a colony in it? Build quality, bee safety, and whether a beginner can actually assemble and run the thing. Standard disclosure, plainly: no brand paid to appear here, and some links go to Amazon, where a purchase may earn us a small commission at no extra cost to you. Prices were verified at publication and drift; check the live listing. And one promise up front: we will not pretend this hobby is effortless. Bees die when keepers wing it. The keepers who read, join a club, and monitor mites keep bees alive.
The short version
- Beekeeping runs on a calendar: take a class in fall or winter, order bees December through February, install April or May. Bees sell out early, so the ordering window is the deadline that matters.
- Start with two hives, not one. Two colonies give you a comparison, a source of rescue resources (brood, eggs, a frame of bees), and roughly double the odds something survives your first winter.
- Budget realistically: a sane first-year setup for two hives runs about $800 to $1,300 all-in, with bees at $150 to $250 per nuc as a market range. Our cost index itemizes every line.
- A nuc (a small established colony on 5 frames) is the beginner-friendly way to get bees; a package (3 lbs of loose bees plus a caged queen) is cheaper and more available but slower to build.
- Varroa mites are the number one reason first-year colonies die. Monitoring monthly and treating on thresholds is not optional extra credit; it is the job.
- Check local ordinances and state registration before you buy anything. Most US towns allow backyard bees with setback and water rules, and many states register hives for free.
01 · Best Starter Hive Kit
Our PickHoney Lake 10-Frame Beehive Starter Kit
The complete, beeswax-coated 10-frame starter that a beginner can actually assemble and run.
Field check: 10-frame Langstroth · beeswax-coated pine · frames and foundation included (listed)
Most starter-kit disappointment comes from what is missing, so the Honey Lake 10-frame starter kit earns its spot by being complete where it counts: boxes, frames with foundation, covers, and a bottom board, in beeswax-coated pine that is weather-ready on day one. At $115.99 it hits the sweet spot between the flimsy sub-$90 kits and the $170-plus bundles padded with trinkets.
It is standard Langstroth dimensions throughout, which means every frame, feeder, and super you buy later fits, and every mentor in your club can work it blind. For the full field, including the 8-frame and premium alternatives, see our starter kit rankings.
- Configuration
- 10-frame Langstroth (listed)
- Material
- Beeswax-coated pine (listed)
- Frames/foundation
- Included (listed)
- Assembly
- Required
- Price
- $115.99
What we like
- Complete kit with frames and foundation included
- Beeswax coating skips the paint step
- Standard Langstroth dimensions for lifetime compatibility
- Leaves budget room for bees and protection
Worth noting
- Thin assembly instructions
- Budget pine wants a stand and winter protection
Who should buy it: First-year beekeepers building their first one or two hives on a sane budget who want standard dimensions, included frames, and a factory beeswax coating instead of a painting project.
What we don't like: Assembly is required and the included instructions are thin; watch a video before you glue. Like all budget pine kits, plan to add a proper stand and, in cold climates, a winter wrap.
Bottom line: The benchmark first hive: a full 10-frame Langstroth stack with frames and foundation actually in the box and a beeswax coating that skips the painting debate. Tolerances are clean enough for first-time assembly, and the price leaves room in the budget for the bees themselves.
02 · Best Protection

USKEEPERS 3-Layer Ventilated Bee Suit
The confidence purchase: 3-layer ventilated mesh that stops stings and summer heat at the same time.
Field check: 3-layer ventilated mesh construction · full suit with veil · listed sting-proof design
Beginners do not get calm from advice, they get calm from armor. The USKEEPERS 3-layer ventilated suit ($129.99) uses the spacer-mesh construction that ended the old choice between sting protection and heatstroke: three layers of ventilated fabric deep enough that a stinger rarely reaches skin, with airflow a cotton suit cannot match.
Work slowly, and the suit buys you the seconds a beginner needs. Cheaper routes exist, and we rank them honestly in the bee suit guide, but protection is the one category where we tell new keepers to spend up front.
- Type
- Full suit with hood/veil
- Construction
- 3-layer ventilated mesh (listed)
- Best for
- Full inspections, hot climates
- Price
- $129.99
What we like
- Ventilated mesh keeps summer inspections bearable
- 3-layer depth stops most stings outright
- Full coverage builds beginner confidence fast
Worth noting
- Costs more than jacket-and-jeans setups
- Loose sizing takes a careful chart read
Who should buy it: New beekeepers and anyone in a hot-summer state. If confidence is your bottleneck, this is the money that fixes it.
What we don't like: Bulky to store and warm compared to a jacket in spring; check the size chart carefully because suits should fit loose.
Bottom line: A ventilated 3-layer suit is what lets a nervous beginner slow down and work properly, and this is our standard pick: real airflow for July inspections, mesh thick enough that stingers run out of reach, and a hood you can see through.
03 · Best Smoker

VIVO Large Stainless Steel Bee Smoker
A large-chamber stainless smoker that stays lit through a full two-hive inspection.
Field check: Stainless steel · large fuel chamber · heat shield (listed)
A smoker that goes out teaches you to work smokeless, which is how gentle colonies get labeled mean. The VIVO large stainless smoker ($29.99) fixes that with capacity: pack it with pine needles or burlap, get it smoldering cool and white, and it will still be breathing when you close the second hive.
The heat shield keeps knuckles honest and the hook hangs it on the hive edge while you work. Fancier bellows exist, and we compare them in the smoker roundup, but this is the one we would not run an apiary without.
- Material
- Stainless steel (listed)
- Size
- Large fuel chamber
- Heat shield
- Yes (listed)
- Price
- $29.99
What we like
- Large chamber stays lit through long inspections
- Stainless build with a real heat shield
- Cheap enough to buy alongside any kit
Worth noting
- Basic bellows
- Learning to keep any smoker lit takes practice
Who should buy it: Every new beekeeper, full stop. Buy the large chamber even for one hive; fuel capacity is patience.
What we don't like: The bellows are serviceable rather than premium, and like every smoker it takes ten lightings to learn. That is the hobby, not the hardware.
Bottom line: The beginner smoker mistake is buying small: little chambers die mid-inspection, which is the worst possible moment. The VIVO large holds enough fuel to smolder through both hives, and the stainless build and heat shield are the parts that matter.
04 · Best First Book
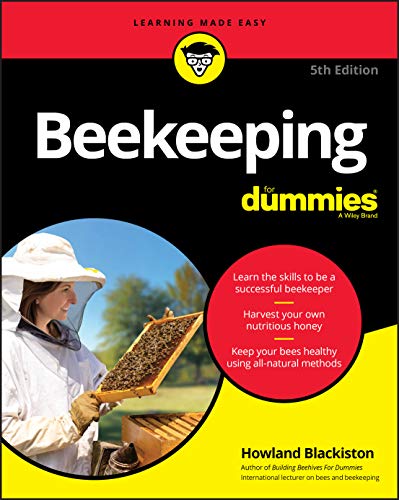
Beekeeping For Dummies
The winter homework: the most complete single beginner reference, organized by real questions.
Field check: Long-running beginner standard · covers equipment, seasons, diseases, harvest
Every mentor we trust tells beginners the same thing: take the class, then read one thorough book cover to cover. Beekeeping For Dummies ($15.99) is our default answer because it is genuinely comprehensive and calm about the parts that scare beginners, disease, stings, and dead-outs included.
It pairs with, not replaces, local mentorship. The rest of the shelf, including the more lyrical and the more scientific options, is ranked in our beekeeping books guide.
- Format
- Paperback reference
- Level
- Absolute beginner to second year
- Price
- $15.99
What we like
- Comprehensive: equipment through harvest in one volume
- Organized by the questions beginners actually ask
- Cheap enough to gift with every mentee's first kit
Worth noting
- Regional detail still requires a local mentor
- Treatment chapters age; verify against current extension guidance
Who should buy it: Anyone between deciding and installing: it is the highest-value $16 in the entire startup budget, and the winter read that makes the class stick.
What we don't like: US-generalist by design, so regional specifics still come from your club, and no book stays current on treatment products; cross-check varroa chemistry against extension guidance.
Bottom line: Classes teach you the local version; this book is the reference for everything else, from anatomy to harvest, in the order a first year actually asks the questions. Read it in winter, keep it in the truck all season.
The short version: what you are actually signing up for
Beekeeping is livestock keeping. That is the sentence that separates the people who succeed from the people who post sad photos of dead colonies in February. You are not installing a garden ornament that makes honey; you are taking responsibility for a superorganism of 20,000 to 60,000 animals with a parasite problem, a food supply that swings with the weather, and a habit of dying quietly if nobody checks on it. The good news is that the job is entirely learnable, deeply satisfying, and lighter than most livestock: figure on 30 to 45 minutes per hive every week or two from April through September, a few heavier project days for harvest and mite treatment, and near-zero winter labor.
The honest stakes: US beekeepers have reported annual colony losses in the range of 40 to 50 percent in recent national surveys tracked by the Bee Informed Partnership, and first-year beekeepers typically run worse than the average, not better. Almost all of that gap is explained by three fixable mistakes: no education, no mite management, and starving colonies that were never fed. This guide exists to close those three gaps before you spend a dollar.
What you get in exchange is real: a front-row seat to one of the most interesting animals on earth, pollination that your garden and your neighbors' gardens will visibly feel, and, from year two onward, honey. Note the timing on that last one. First-year colonies spend their energy drawing comb and building population, and often produce little or no surplus honey; established hives in most US regions average somewhere in the 30 to 60 pound range in a decent year, and we cover the honest math in how much honey one hive really makes. Go in expecting a fascinating first year and a sweet second one, and you will not be disappointed.
Step zero: take a class and join your local club
Before the hive, before the bees, before this site's own roundups: find your local beekeeping association and take a beginner course. Nearly every US county is covered by a club, and most run a winter beekeeping school for somewhere between $50 and $150, often including a year of membership. University extension programs are the other pillar; Penn State's Beekeeping 101 is a well-known online option, and most land-grant universities offer an equivalent. If you do exactly one thing this guide says, do this one.
The reason is not the curriculum, though the curriculum is good. It is the people. A club gives you a mentor who has kept bees in your specific microclimate, someone to text a blurry photo of a queen cell at 7 pm, a source of local nucs from stock that has already wintered where you live, and a norm-setting community that will gently shame you into monitoring mites. Beekeeping is intensely local: the right feeding schedule in Alabama is wrong in Minnesota, and no national website, this one included, can replace a mentor who knows your nectar flow.
The legal homework: ordinances, registration, and neighbors
Backyard beekeeping is legal in most of the United States, including most cities, but it is regulated at three levels and you should check all three before money leaves your wallet. First, your municipality: search your town or city code for "bees," "apiary," or "beekeeping." Typical urban and suburban rules cap the number of hives per lot, require setbacks (commonly 5 to 25 feet from property lines), require a flyway barrier such as a 6-foot fence or hedge if hives face a neighbor, and require a water source on your property so your bees drink from your birdbath instead of the neighbor's pool. A few municipalities and some HOAs still prohibit hives outright; find out now, not after the bees arrive.
Second, your state. Many states require or encourage apiary registration with the state department of agriculture, often free or nearly free, and registration typically plugs you into the state apiarist's inspection program, disease alerts, and pesticide-spray notification systems. This is a benefit, not a burden: state inspectors are among the best free mentors in the hobby. Third, if you ever sell honey, your state's cottage food or honey-house rules apply, but that is a year-two problem.
Then there is the unwritten law: neighbors. A jar of honey and a heads-up conversation before the bees arrive prevents 90 percent of conflicts. Site hives so flight paths cross your own yard, keep a water source full from March on, and requeen any colony that turns defensive. The beekeepers who get complaints are almost never the ones who talked to the people next door first.
Choose your hive type: Langstroth, top bar, or Warre
The Langstroth hive is the stack of boxes you picture when you picture a beehive, and it has dominated since Rev. L. L. Langstroth patented it in 1852 after working out "bee space," the roughly 3/8-inch gap bees will leave open as a corridor instead of gluing shut with comb or propolis (Wikipedia: Langstroth hive). Bee space is why Langstroth frames lift out cleanly for inspection, and it is the reason essentially all US commercial equipment, replacement parts, nucs, and mentor advice assume Langstroth dimensions. Our roundups of 10-frame and 8-frame hives are all Langstroth for this reason.
Top bar hives hold comb hanging from bars in a single horizontal trough: no lifting boxes, cheap to build, lovely to observe, but the comb is fragile, harvest destroys it, and your club mentor probably cannot lend you parts. Warre hives are a vertical top-bar hybrid managed with minimal intervention. Both are legitimate; neither is the low-friction path for a first-year keeper who needs compatible gear and compatible advice. Our full comparison is in Langstroth vs top bar vs Warre, and the auto-extraction question gets its own treatment in Flow hive vs Langstroth.
Eight frames or ten? Pick with your back
Within Langstroth land there is one sizing decision: 10-frame boxes (the traditional standard) or 8-frame (narrower, lighter). It matters more than beginners expect, because full boxes are heavy. A 10-frame deep packed with honey weighs about 80 to 90 pounds by common listed estimates, and even a 10-frame medium super runs around 50 pounds full. The 8-frame versions shave roughly a fifth off every lift, which your lower back will notice on every single inspection for the life of your beekeeping career.
Ten-frame remains the default for compatibility and for maximum brood-nest volume per box, and it is what most nucs, most used equipment, and most club loaner gear assume. Eight-frame is the right call for smaller-framed keepers, anyone with back trouble, and anyone planning to run all-medium boxes, a popular one-size-fits-everything strategy. Both are fully legitimate; mixed apiaries are annoying, so pick one width and stay with it.
We wrote the full decision guide, with weight tables, at 8-frame vs 10-frame beehives. If you want the short version: strong flow region and no back concerns, 10-frame; everyone else should at least read the 8-frame case before defaulting.
Start with two hives. Yes, really
The single best equipment decision a beginner can make costs one more hive: start with two colonies instead of one. This is standard advice from every extension program and every club for concrete, mechanical reasons, not as an upsell. With one hive you have no baseline: is that normal brood or spotty brood, normal traffic or robbing, a normal queen or a failing one? With two hives, one look across the stand answers half your diagnostic questions, because colonies installed the same week in the same yard should roughly track each other, and the one that does not is telling you something.
Two hives are also each other's insurance policy. A queenless colony can be handed a frame of eggs from its neighbor and raise a replacement. A weak colony can be boosted with a frame of capped brood from a strong one. A colony that dies in November can be shaken out and its honey stores moved next door. Every one of those rescues is impossible with a single hive, where every problem is a potential total loss and a lost year.
Where bees come from: nucs vs packages
Bees are not included with any hive kit, a fact that surprises more buyers than any of us would like to admit. You buy bees separately, from a local supplier or by mail, in one of two formats. A package is roughly three pounds of loose worker bees (around 10,000) in a screened box with a caged, unrelated queen and a can of syrup. Packages typically run about $100 to $180 depending on region and year, ship widely, and are the format most classes teach installation with. Their downside is that they start from zero: no comb, no brood, no stores, just bees and a queen who still has to be accepted and start laying.
A nuc (nucleus colony) is a small functioning hive on five frames: laying queen, brood in all stages, stores, and bees that are already an organized family. You transfer the five frames into your own deep box and the colony simply continues. Nucs run roughly $150 to $250 as a market range, are usually raised locally from stock that has wintered in your area, and are three to four weeks ahead of a package from day one. For beginners we think the nuc is worth every extra dollar: more forgiving, faster building, and the queen is proven. Buy from a local producer through your club when possible; that is also your quality control.
Two other sources exist and are worth knowing about: a swarm is free bees if you are ready with equipment and nerve when the call comes (our gear list is in nuc boxes and swarm traps), and a split from a mentor's hive is often the best-adapted bee money can buy. Neither is a plannable year-one strategy; both are excellent year-two ones. If you do buy a nuc, having a spare box like the Mann Lake Pro Nuc ($38.81) around is one of those quietly essential purchases: transport, swarm catching, and emergency housing all live in that one cheap box.
The ordering calendar: bees sell out in winter
Here is the piece of timing that catches nearly every first-year beekeeper: you order bees in winter for spring delivery. Reputable package and nuc producers open orders between December and February and sell out, often within weeks for the good local nuc suppliers. Delivery and pickup then happen April through May in most of the country, timed to your region's buildup. Walk into April looking for bees and you will find waiting lists, distant pickups, or nothing.
So the real sequence for a spring start looks like this. Fall: enroll in the winter class, join the club, start reading. December to February: order two nucs (or packages) from a supplier your club vouches for, and order your equipment so winter evenings can go to assembly and painting. March: finish the apiary site, set stands, mix your first feed. April to May: bees arrive, install, feed, and the season is on. Every one of those steps has slack in it except the ordering window.
The gear that matters: hive, suit, smoker, tool
Strip away the catalog noise and a functioning first apiary needs four things per keeper and a short list per hive. Per hive: a bottom board, one or two deep brood boxes with frames and foundation, an inner cover, a telescoping outer cover, an entrance reducer, and a feeder. The cleanest way to buy that list is a starter kit, and after reviewing the field our benchmark is the Honey Lake 10-frame starter kit ($115.99): beeswax-coated pine, frames and foundation actually included, and tolerances a beginner can assemble without a woodshop. The full field, including 8-frame and premium options, is ranked in our starter kit guide.
Per keeper: protection, smoke, and steel. A ventilated full suit is the confidence purchase that makes every other skill learnable; the USKEEPERS 3-layer ventilated suit ($129.99) is our standard recommendation, and the alternatives from jackets to budget suits are in the suit guide and jackets and gloves. Goatskin gloves like the Forest Beekeeping goatskin gloves ($24.95) round out the kit. The smoker is not optional equipment, it is the interface through which you and 40,000 bees stay calm together; the VIVO large stainless smoker ($29.99) is the right size to stay lit through a two-hive inspection. Add a hive tool or two (they grow legs) and you are equipped.
What you do not need in year one: an extractor (borrow the club's), a queen-rearing kit, an observation hive, or most of what a 30-piece bundle contains. We keep a running list of skippable purchases in the beehive kit buying mistakes guide, which we suggest reading with your wallet closed.
The cost reality check
Real numbers, because this is the question everyone Googles at 11 pm: a two-hive first year, bought sensibly, lands between roughly $800 and $1,300 all-in. That covers two hive setups (about $115 to $170 each as starter kits), protection ($50 to $130), smoker and tools ($40 to $60), two nucs at the $150 to $250 market range, feeders and a season of sugar, mite monitoring and treatment supplies, and a stand and winter wrap. A single-hive minimalist build can squeak under $500; a premium insulated two-hive apiary can pass $1,800 without trying.
Where beginners actually lose money is not the list above, it is buying it twice: the too-cheap kit with warped boxes that gets replaced in August, the fashion veil that fails at the worst moment, the bundle full of gadgets that never leave the shed. Spend properly on woodenware, protection, and bees; go cheap cheerfully on scrapers and brushes.
Siting the apiary: where the hives go
Bees are flexible about real estate, but the difference between a decent site and a good one shows up all season. The wish list: morning sun on the entrance (gets foragers flying early and helps dry the hive), afternoon shade in hot climates, a windbreak on the winter-wind side, well-drained ground, and enough room to stand and work behind or beside each hive with a fully loaded box in your hands. Face entrances east or southeast where you can, and away from sidewalks, patios, and the neighbor's swing set. In suburban yards, a 6-foot fence or hedge in front of the entrance forces flight paths up over head height within a few feet, which solves most human-bee conflicts before they start.
Get the hives off the ground. A stand at 16 to 18 inches keeps bottom boards dry, skirts most skunk harassment, and saves your back a few degrees of bend on every lift; a purpose-built stand like the MayBee adjustable hive stand ($38.94) levels on uneven ground, or a pair of concrete blocks and pressure-treated rails does the job. Our full siting and stand guide is here. Provide water from day one, a birdbath with landing stones or a bucket with corks, because bees imprint on a water source early and a neighbor's pool is a habit you cannot break later. In bear country, an electric fence is not optional; budget for it in the site plan, not after the first visit.
Install day: getting bees into the hive
Installation is easier than your pulse will suggest. For a nuc: suit up, smoke lightly, open your hive, remove five center frames, and transfer the nuc's five frames one at a time in the same order and orientation, holding each over the box. Push them together, fill the flanks with your empty frames, add the feeder, close up, and reduce the entrance. Ten minutes, most of it spent being amazed. Leave the bees clinging inside the nuc box shaken gently in front of the entrance; they will walk home.
For a package: pry off the lid, remove the syrup can and the queen cage, check the queen is alive, and hang or wedge her cage (candy end up) between two center frames. Then shake the three pounds of bees into the hive in one confident pour, set the mostly-empty package by the entrance, add feeder, close up. The colony releases the queen by eating through the candy plug over two to four days, which paces acceptance; resist the urge to "help." Check in about a week: queen out, eggs present, cage removed. Full technique, including the timing details per format, belongs to your class and your mentor; the overview here is so nothing on install day is a surprise.
Two rules for the first fortnight: feed continuously, and stay out beyond the quick queen check. New colonies are drawing comb on a syrup engine and establishing brood; every unnecessary opening costs them heat and momentum. Nervous checking is the most natural beginner instinct and the least helpful one.
Feeding: the unglamorous job that builds the hive
A new colony on fresh foundation is a construction site, and comb is expensive: bees convert nectar or syrup into wax at a steep exchange rate, and until comb exists the queen has nowhere to lay and foragers have nowhere to store. So we feed new colonies 1:1 sugar syrup (by weight or volume, it genuinely does not matter) continuously from install until the deep boxes are mostly drawn or a strong natural flow makes them ignore the feeder, typically four to eight weeks. This one habit, more than any gear choice, separates booming first-year colonies from limping ones.
Feeder format matters for a practical reason: refill disturbance. Top feeders sit above the colony and hold enough syrup that you refill twice a week without opening the brood nest or suiting up fully; the KAGZ 1.5-gallon top feeder ($37.99) is our standard pick for 10-frame hives. Entrance feeders are cheap and fine for a light touch but invite robbing in a dearth. The full field is compared in our bee feeder guide. In fall, the recipe changes to 2:1 heavy syrup to build winter stores, and in the cold months feeding means dry sugar or fondant above the cluster, never liquid. Region and month specifics live in the first-year calendar.
The inspection rhythm: every 7 to 10 days, with a purpose
From spring through midsummer, open each hive every 7 to 10 days. That interval is not arbitrary: it is tuned to swarm biology, because a colony that starts queen cells can have a virgin queen capped and a swarm gone in about that window, and to how fast problems like queenlessness compound. Each inspection answers four questions, and you can answer them in 15 minutes per hive once your hands calm down. One: is the queen laying? You are looking for eggs and young larvae, not the queen herself; eggs mean she was there within three days. Two: does the colony have room, or is it packing every frame and thinking about swarming? Three: does the brood look healthy, with a solid pattern and pearly larvae? Four: how are stores and population trending versus your other hive?
Keep records from inspection one. A notebook or an app, either works; what matters is that in July you can see that hive two has been trailing for three inspections, which is a pattern, where a single observation is just a mood. Ease off the cadence after the main flow: every two to three weeks in late summer, monthly-ish in fall, and closed up in winter except for quick hefts and entrance checks.
Varroa: the fight you signed up for, whether you knew it or not
Every honey bee colony in the continental United States should be assumed to have Varroa destructor, a parasitic mite that feeds on bees and, worse, transmits the viruses that actually kill colonies (Wikipedia: Varroa destructor). Varroa is the leading driver of the loss rates in the national surveys, and "I didn't treat and they died in November" is the single most common first-year obituary. The mite does not care that your bees look great in July. Colonies crash in fall from viruses seeded in summer.
The job has two halves. Monitor monthly May through October with an alcohol wash or sugar roll: half a cup of bees (about 300) from a brood frame, agitated in alcohol or powdered sugar, mites counted. Extension guidance converges on treating at around 2 to 3 mites per 100 bees, a threshold documented in the Honey Bee Health Coalition's varroa management guide, which is the best free document in beekeeping and should be on your phone. Treat when you hit threshold, choosing a product legal for your situation and temperature window: formic acid strips like Formic Pro ($30.00) work within their label window of roughly 50 to 85F and can stay on during honey supers per label; oxalic acid shines in broodless periods; thymol and amitraz have their own lanes. Rotate chemistries year to year. Our full comparison is in the varroa treatment guide, with vaporizer hardware in the oxalic vaporizer roundup.
If you internalize one sentence from this entire guide, make it this one: varroa monitoring is a scheduled chore like feeding a dog, not a response to visible trouble. By the time trouble is visible, you are late.
Your first winter: the final exam
Winter is where first years are graded, and the test is written in August and September. A colony survives winter on three assets it must bank in fall: a large population of long-lived "winter bees" (which requires low mite loads in late summer, see above), roughly 40 to 60 pounds of stores in cold-winter regions (less in the South), and a dry, draft-managed box. The fall checklist follows directly: treat mites by late summer so winter bees are reared healthy, feed 2:1 syrup through September and October until the hive hefts heavy, reduce entrances and add mouse guards, tilt hives slightly forward to shed water, and sort out moisture management, because condensation dripping on the cluster kills more colonies than dry cold does. A quilt box, moisture board, or upper vent handles it.
In cold climates, wrapping adds a real margin: a fitted wrap like the MayBee winter hive wrap ($26.99) cuts wind and helps the cluster spend calories on heat instead of replacement. The full winterizing walkthrough, including region lines for who needs what, is in stands and winter wraps and the November chapter of the first-year calendar. Through winter your job shrinks to hefting the back of the hive monthly, adding emergency sugar if it lightens, and leaving them alone. On the first warm afternoon in late winter, watch the entrance: cleansing flights streaming out of a hive you last opened in October is the best feeling this hobby sells.
The whole first year on one page
Here is the plan compressed, from decision to anniversary. Fall: beginner class, join the club, read a book, check ordinances, register if your state asks. December to February: order two nucs from a club-vouched supplier; order hives, suit, smoker, tools, feeders; assemble and paint in the garage. March: finish the site, set stands, water source up. April to May: install, feed 1:1 continuously, first inspections on the 7-to-10-day rhythm. June: add space as boxes fill; first alcohol washes. July: monitor mites monthly, watch for dearth robbing, keep water full. August: treat varroa at or before threshold; this is the month that decides winter. September to October: feed 2:1 to weight, reduce entrances, mouse guards, moisture plan, wrap in cold climates. Winter: heft monthly, emergency sugar if needed, order year-two gear in the sales. Spring two: alive, experienced, and now the honey year starts.
Read that list twice and notice what is not on it: no extractor, no honey harvest, no expansion decisions. Year one has one goal, colonies alive in March, and everything above serves it. The expanded version with month-by-month detail and region adjustments is the first-year beekeeping calendar; the shopping half is the cost index; and the mistakes to skip are cataloged in beehive kit buying mistakes. Take the class, order the bees in winter, feed them, count mites, and we will see you and your two overwintered colonies at the start of the honey guide next spring.
How to Start Beekeeping
- 1
Take a beginner class and join your local club
Enroll in a fall or winter beekeeping course through your local beekeeping association or a university extension program, and join the club. A mentor who keeps bees in your microclimate is the single highest-value asset a new beekeeper can acquire, and clubs are also your best source for locally raised bees.
- 2
Check local ordinances and register your apiary
Search your municipal code for beekeeping rules on hive counts, setbacks, flyway barriers, and water requirements, confirm your HOA allows hives, and register with your state department of agriculture where required or offered. Talk to your immediate neighbors before the bees arrive.
- 3
Choose your hive type and size
Start with a wooden Langstroth hive for compatibility with local mentors, suppliers, and replacement parts, then choose 10-frame boxes for the traditional standard or 8-frame to cut roughly a fifth off every lift. Plan on two hives, not one, so the colonies can back each other up.
- 4
Order bees between December and February
Order two nucleus colonies (about $150 to $250 each as a market range) from a local, club-vouched producer, or two 3-pound packages if nucs are unavailable. Good suppliers sell out in winter for April-May delivery, so the ordering window is the hard deadline in the whole plan.
- 5
Buy and assemble your equipment over winter
Buy a quality starter kit per hive (bottom board, deep brood boxes with frames and foundation, inner and outer covers, entrance reducer), plus a ventilated suit, gloves, smoker, hive tools, and a top feeder. Assemble and paint or oil the exteriors before spring so everything is weathered and ready.
- 6
Site the apiary and set the stands
Place hives on stands 16 to 18 inches high with morning sun on east- or southeast-facing entrances, a windbreak, drainage, and working room behind each hive. Add a flyway barrier where entrances face neighbors, and establish a water source before the bees arrive so they imprint on yours.
- 7
Install your bees and feed continuously
Transfer nuc frames into the center of the brood box in order, or shake a package and hang the queen cage between center frames until she is released. Feed 1:1 sugar syrup continuously from install until the brood boxes are mostly drawn comb, typically four to eight weeks.
- 8
Inspect every 7 to 10 days with a checklist
Through spring and early summer, open each hive every 7 to 10 days to confirm eggs and young brood, check that the colony has room, look for healthy brood pattern, and compare stores and population against your second hive. Keep written records of every inspection.
- 9
Monitor varroa monthly and treat at threshold
Run an alcohol wash or sugar roll on about 300 bees monthly from May through October and treat when counts reach roughly 2 to 3 mites per 100 bees, following extension and Honey Bee Health Coalition guidance. Choose treatments by temperature window and label, and never skip the late-summer round.
- 10
Prepare the colony for its first winter
In early fall, feed 2:1 syrup until stores reach roughly 40 to 60 pounds in cold regions, reduce entrances, install mouse guards, manage condensation with a quilt box or moisture board, and wrap hives in cold climates. Heft monthly through winter and add emergency sugar if the hive grows light.
More gear worth comparing
Beyond this guide: the highest-rated gear across every category and budget, with a live price check on each.


As an Amazon Associate we may earn from qualifying purchases, at no cost to you.
Quick shop: every pick
Skip the scroll: the whole lineup, with a live price check on each.
- Honey Lake 10-Frame Beehive Starter KitBest Starter Hive KitHoney Lake · $115.99Check price →
- USKEEPERS 3-Layer Ventilated Bee SuitBest ProtectionUSKEEPERS · $129.99Check price →
- VIVO Large Stainless Steel Bee SmokerBest SmokerVIVO · $29.99Check price →
- Beekeeping For DummiesBest First BookWiley · $15.99Check price →
Key terms
- Nuc (nucleus colony)
- A small, functioning colony sold on five frames: a laying queen, brood in all stages, stores, and workers. Transferred into a full hive, it continues without missing a beat, which is why nucs (roughly $150 to $250 as a market range) are the beginner-friendly way to start, typically three to four weeks ahead of a package.
- Package
- About three pounds of loose worker bees with a caged, unrelated queen and a syrup can, sold by weight and installed by shaking the bees into a hive. Cheaper and more widely shipped than nucs, but the colony starts from zero comb and the queen must still be accepted and begin laying.
- Bee space
- The roughly 3/8-inch gap honey bees leave open as passageways instead of filling with comb or propolis. Langstroth's 1852 application of bee space is what makes removable-frame hives, and therefore modern inspection-based beekeeping, possible.
- Varroa destructor
- A parasitic mite present in essentially all US colonies that feeds on bees and vectors the viruses responsible for most colony deaths. Managed by monthly monitoring (alcohol wash or sugar roll) and treating at a threshold of roughly 2 to 3 mites per 100 bees.
- Alcohol wash
- The standard varroa monitoring method: about 300 bees (half a cup) from a brood frame agitated in alcohol, dislodged mites counted, and the result read as mites per 100 bees. A sugar roll is the non-lethal, slightly less precise cousin.
- 1:1 and 2:1 syrup
- Sugar-to-water ratios for feeding. Thin 1:1 syrup mimics nectar and fuels spring comb-building and brood rearing; heavy 2:1 syrup is fed in fall so bees can store and cap it quickly as winter provisions.
- Winter bees
- The physiologically distinct, long-lived bees reared in late summer and fall that carry the colony through winter. They must be raised by healthy, low-mite colonies, which is why late-summer varroa treatment decides winter survival months in advance.
- Flyway barrier
- A fence, hedge, or screen about six feet high placed near hive entrances that forces bee flight paths above head height. Commonly required by urban ordinances and the cheapest neighbor-relations tool in beekeeping.
Questions, answered
How do I start beekeeping with no experience?
Take a beginner course through your local beekeeping club or a university extension program this fall or winter, read one thorough book, and line up a mentor. Then order two nucs in the December-to-February window, buy a starter hive kit, suit, smoker, and feeder over winter, and install your bees in April or May. The sequence matters more than talent: education first, bees ordered in winter, equipment ready before they arrive.
How much does it cost to start beekeeping?
Plan on roughly $800 to $1,300 for a sensible two-hive first year: about $115 to $170 per hive kit, $50 to $130 for protection, $40 to $60 for smoker and tools, $150 to $250 per nuc of bees, plus feeders, sugar, and mite treatment. A single-hive minimalist build can come in under $500. Our beekeeping cost index breaks down every line item in budget, standard, and premium versions.
When should I order bees for spring?
Between December and February. Reputable nuc and package producers open orders in winter and sell out, often within weeks, for pickup or delivery in April and May. If you miss the window, call your local club about late nucs and overwintered splits, and be ready for swarm season, but do not count on walking into bees in April.
Should I start with one hive or two?
Two. A second colony gives you a comparison baseline for diagnosing problems, and it is a resource bank: a queenless hive can raise a new queen from a neighbor's frame of eggs, and a weak colony can be boosted with brood from a strong one. None of those rescues is possible with one hive. Since the suit, smoker, and tools are shared, the second hive only adds about $250 to $400.
What is the difference between a nuc and a package of bees?
A nuc is a small established colony on five frames with a laying queen, brood, and stores, typically $150 to $250; you transfer the frames and it keeps building. A package is about three pounds of loose bees with a caged queen, usually cheaper, but it starts with no comb or brood and runs three to four weeks behind. For beginners we recommend a locally raised nuc when you can get one.
Is beekeeping legal in my city?
Probably, but verify. Most US municipalities allow backyard hives with conditions such as hive-count caps, property-line setbacks, six-foot flyway barriers, and a required water source, while a minority of cities and some HOAs prohibit them. Search your municipal code for apiary or beekeeping, check your HOA covenants, and register with your state agriculture department where required.
How much time does beekeeping take?
About 30 to 45 minutes per hive every 7 to 10 days from April through September, plus a few longer project days for installs, mite treatments, and fall feeding, and near-zero hands-on time in winter. The first season runs heavier because everything is new and inspections are slower. It is a weekly-rhythm hobby in season, not a daily chore.
Will I get honey the first year?
Usually little or none, and that is normal. A first-year colony spends its energy drawing comb and building population, and in most regions the surplus starts in year two, when established hives commonly average 30 to 60 pounds in a decent season. Treat year one's harvest as a bonus if it happens, and treat colonies alive in March as the real crop.
Do I really have to treat for varroa mites?
If you want living colonies, effectively yes. Varroa and its viruses are the leading killer of managed colonies, and untreated first-year hives routinely crash in fall. Monitor monthly from May through October with an alcohol wash or sugar roll and treat at roughly 2 to 3 mites per 100 bees, per extension and Honey Bee Health Coalition guidance. Treatment-free approaches exist but are an expert project, not a beginner default.
What should I buy first for beekeeping?
In order: education (a class and a book), then bees on order from a local supplier, then per hive a complete starter kit with frames and foundation, then per keeper a ventilated suit, gloves, a large smoker, and a hive tool, then a top feeder per hive. Skip extractors, gadget bundles, and queen-rearing gear in year one; the startup money belongs in woodenware, protection, bees, and mite management.
Filed under Explainer
Part of Beekeeping 101
Keep reading
The Beekeeping Cost Index
Every startup line item priced: budget, standard, and premium builds, year-two costs, and the honest cost per pound of hobby honey.
Your First-Year Beekeeping Calendar
The month-by-month version of this plan, from winter ordering to your first spring inspection, with adjust-by-region notes.
12 Beehive Kit Buying Mistakes
The catalog of expensive beginner errors, from one-hive starts to veil-less budget kits, and how to skip every one.
The Best Beehive Starter Kits
The full ranked field of first hives, benchmark to budget, judged by whether we would put a colony in them.
8-Frame vs 10-Frame Beehives
The sizing decision your lower back will live with: full weight math and who should pick which.
The Best Varroa Mite Treatments
The job that decides winter survival: every mainstream treatment compared by chemistry, temperature window, and timing.